Hey everyone....I wanted to share this little canvas Luggage Tag project I made. It is my latest project for my Linnie Blooms design team. I think it is perfect for you ladies who are in the Pocket Letter Pals groups. What a sweet little treat this would be to send. :)
First I used Tim Holtz inks Fired Brick, Spiced Marmalade and Fossilized Amber to paint my canvas tag. Then made the little rosettes with my Sizzix die cut and some Fall paper.
I used Tim Holtz Seasonal Small talk for the words on the rosettes. I found some Fall colored Trim, a leaf and a button for the top. I used Copper Stickles in the center of the button to give it a little sparkle and I outlined the words on the rosette with it also.
Easy to make and I think anyone who receives it would love it. :)
I have all the products in the store to make these and I have the rosettes cut and packaged and ready to make. Come by and see what else we have going on... lots of classes for the Holidays.
Check out the store Facebook page for more ideas and events coming up.
https://www.facebook.com/Morning-Star-Crafts-and-Collectibles-LLC-248624745207213/?ref=hl
God Bless,
~Dawn
Sunrise Scrapbook & Vintage
Friday, October 30, 2015
Monday, September 21, 2015
Autumn..my project for the Linnie Blooms Blog hop with Faber-Castell

Good Afternoon everyone! I had a lot of fun with all the cool products I received from Faber-Castell for our Blog Hop. I hope you enjoy what I have come up with. LOL...in the picture it kind of looks like a one eyed monster. Well Happy Fall and Halloween then. ;)
I started with Linnie Blooms 12x6 blank canvas...one of my favorite pieces to work with. I painted it with Gelatos using brilliant Fall colors...LOVE how Gelatos blend. Then I sprayed the piece with Tattered Angels sprays to enhance the color and give it a sparkle.
I used a heat gun to dry the Gelatos paint before going on and using the Faber-Castell Glass Bead Glitter Gel colored with Gelatos over the top...then I used the Faber-Castell texture cards..number 5 and ran it through while it was still wet. I LOVE LOVE LOVE these cards. I will be using them in ALL my mixed media projects. I also love the Glass Bead Glitter Gel and will use it in mixed media. What a cool product and easy to color with Gelatos.
Look at the dimension and thickness the Glitter Gel makes. WOW!
I then used the Faber-Castell Mixed media stencils to make a little banner.
I used the Faber-Castell PITT artist pen, Deep Scarlet Red to stamp the letters. Perfect color to go with the canvas background colors.
For the Linnie Blooms sunflower cutout I used a yellow and orange gelato to color it. I used some ribbon and a button for the center and a twig from my yard painted black as the stem.
Love how my little banner turned out....so cute! I used copper Stickles around the edges to make them sparkle.
Look at the depth and dimension the Glitter Gel gives you...How cool is this stuff!
And here you go....I do love the Fall colors. So pretty. What a fun project this was.
Here is a close up of the Linnie Blooms sunflower.
Thank you for checking out my blog post. I hope you all enjoyed it.
Please check out my other projects and "LIKE" my stores Facebook page for more great ideas or just for some fun.
Here is the link to my store Facebook page.
Morning Star Crafts and Collectibles.
https://www.facebook.com/Morning-Star-Crafts-and-Collectibles-LLC-248624745207213/timeline/?ref=hl
Thanks again and God Bless,
~Dawn
Saturday, July 11, 2015
Sweet Treasured memories album
I just love how this little album turned out. I use Carta Bella wedding papers...you can really use it for anything. Maybe an anniversary...Mother's Day. You can pick and choose from the cards that come with the paper line and make it whatever you like.
This is a class we will be doing in the store....visit us on FB @ Morning Star Crafts and Collectibles and on instagram @ Dawn~Marie~Mattson.
Have a Blessed weekend...be safe.
~Dawn
This is a class we will be doing in the store....visit us on FB @ Morning Star Crafts and Collectibles and on instagram @ Dawn~Marie~Mattson.
~Dawn
Wednesday, May 27, 2015
Linnie Blooms Bloghop with Stampendous! Sisters book
Hey...Dawn here from the Linnie Blooms Design Team. This is my project for our bloghop with Stampendous. LOVE all these products and have them all in my store also.
I used the Linnie Blooms canvas book...I got a little carried away using the fabric on it..but I think it came out so sweet...and so me. I added an old doily I found and wrapped it around the book.
The doily had 2 rings that I used to tie a piece of lace through to close it.
Here is a picture of the open covers with the doily wrapped around it.
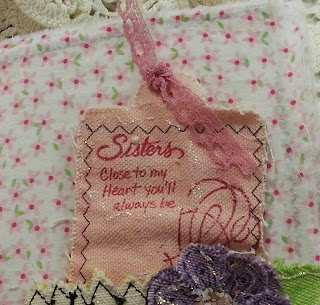
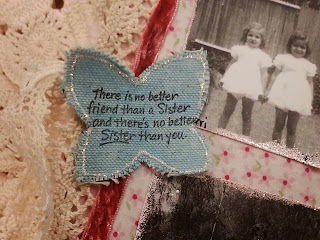
First inside pages...I used the sister stamps I received from Stampendous and stamped on the Linnie Blooms butterfly and luggage tag the cute sayings. I put the tag inside the Linnie Blooms fence I glued on the page. I left it a natural color because I liked how it looked. I used Gelatos to paint the butterfly, tag, flowers and leaf. I used the Encrusted Jewel kit fragments in pink for the center of the flower. How cool are these!
The tag and butterfly closeup with the stamps on them...I really like this sister line of stamps and know I will be using it to make cards for my sisters. :)
Isn't this Encrusted fragments some awesome stuff...wow! I want more in ALL the colors.
This is the next page layout...I think it looks like pajamas. lol I need pics of my sisters and me at a sleepover. Maybe this Summer when we are camping.
Here are three more Linnie Blooms flowers painted with Gelatos and filled in the centers with Encrusted fragments. I also stickled around all the flowers to make them blingy.
And the last layout is a little poem I like and a picture of me, my mom and my oldest sister. The butterfly is Linnie Blooms with a little paper flower in the center.
Linnie Blooms luggage tags from inside the book.
I put one of the tags inside the pocket of the book. How cute is this pocket...Love it!
Thanks for checking out my project...enjoy the rest of the hop!
Check out my other Team members projects....and The Stampendous team too. Just click the links below. :)
Ann Strecko Koeman
Gail Green
Karen Sessions
Mayoori Jain
Noelia Inglesis Gonzalez
Trish Cortez
Dawn Mattson
Stampendous Team
Monday: http://wp.me/psmPc-3xZ
Tuesday: http://wp.me/psmPc-3ys
Wednesday: http://wp.me/psmPc-3yu
Thursday: http://wp.me/psmPc-3yw
Friday: http://wp.me/psmPc-3yy
Thanks! ~Dawn
Wednesday, April 22, 2015
Blooming Linnie Blooms mini pillows....Linnie Blooms Blog hop project!
Oh my goodness! This will be fun!
Here is my Linnie Blooms blog hop project. I hope you all enjoy it as much as I had fun making it. Would be great for Mother's Day....:)
Don't forget to comment and go to all the other links and comment...you can win $50 in Linnie Blooms products!
What do you think? I love these little pillows and plan on making lots more and different flowers.
First I took the large Linnie Blooms leaves and cut them all in half...
I used 8 leaves and cut them in half to make 2 rows for the sunflower that fit perfect on the mini pillows.
Then I arranged them onto the mini pillow to look like a sunflower.
I took 8 more leaves and rounded one edge for petals on my daisy. I left 2 leaves to use as leaves.
I arranged them on the pillow and took pictures with my phone to remember placement on both pillows.
I used acrylic paint to paint everything. You can use the colors you like but I think the sunflower needs to be yellow. I ironed everything paint side down to make them flat after they were dry.
I made the daisy white...but you could make the flowers all kinds of pretty colors. Bright and cheery colors would be great. Make daisy pillows in all different colors...how cool would that be. :)
I glued all the petals in place with hot glue.
I painted over them with a couple coats of PPA...Perfect Paper Adhesive. Just to soften them and it helps to keep them clean. It will not dry shiny...but protected.
I hunted for small black buttons...they are harder to find than I thought...and I used them for the center of my sunflower. You might want to paint the center black first so the green doesn't show through. Mine did and I used black beads to hide it...:) For the daisy I found a big pretty yellow button.
I used a black PITT artist pen to dot the center...
All you have to do is stuff them.
And there you go! So cute and a great gift for Mom..sister..daughter, granddaughter.
Be sure to click on the Linnie Blooms Design Team logo and you can find all kinds of Linnie Blooms products to make your own pillows. And for any of my customers...I have them in store too.
Here are the links to my other team members blogs...comment and you could win!
https://www.facebook.com/pages/Morning-Star-Crafts-and-Collectibles-LLC/248624745207213?ref=hl
~Dawn
Subscribe to:
Comments (Atom)


